
Monotub Fruiting Chambers

Today I’d like to talk about monotub fruiting chambers; the pros and cons, types of mushrooms that can grow in them, and what is entailed in constructing one on your own.
What IS a Monotub fruiting chamber?
A fruiting chamber is essentially an enclosed space that is used to create the conditions required for mushrooms to thrive, in essence- mimicking their natural environment. Fruiting chambers allow mushroom cultivators to dial-in their desired light, temperature and humidity settings, often using automatic timers to keep everything in check and moving like clock-work. Monotub fruiting chambers specifically are used two-fold, for both the Incubation phase and Fruiting phase of the mushroom grow cycle, as opposed to Shotgun Fruiting Chambers which are only used for the fruiting phase.
So a fruiting chamber is an enclosed space used to mimic natural conditions, and a Monotub is simply a low-maintenance, low-cost design, generally constructed out of a plastic tote or bin with a lid. We’ve never heard mention of where the term “monotub” came from but it seems likely that it came from the idea of using a bin or tote (tub) for a single (mono) purpose.
Monotubs are a great choice for small-scale cultivators because they are inexpensive, easy to make, and don’t require a ton of space. There isn’t a best mushroom fruiting chamber, it’s about choosing what is right for your needs and goals, using a design that suits your grow space and the particular mushroom strain you are cultivating. Depending on your budget, and the amount of mushrooms you are looking to produce, growers may also want to consider alternative chambers such as a shotgun fruiting chamber, martha grow tent, or hydroponics grow tent.
Pros and Cons
Everything has its pros and cons and monotubs are no different. Here’s a list of the important ones:
PROS:
- Affordable
- Easy to make
- Requires only a few basic tools
- Takes up little space
- Re-usable
CONS:
- Only suitable for certain species of mushrooms
- Not enough space for large-scale production
Which mushroom species can grow in a monotub chambers?
There are a number of mushroom strains that can be produced in a simple monotub chamber, some of them are; reishi, oysters (king, pearl, pink, blue and phoenix), wine caps, enoki, pioppino, chestnut, button, cremini, shaggy mane, and perhaps most commonly the Psilocybe species. For those interested in producing larger yields, it can be more beneficial to grow the listed species in bags using a shotgun fruiting chamber or grow tent.
In deciding which type of fruiting chamber is suitable for your needs, the first question to ask is what type of mushrooms are you planning to grow? Once you’ve decided you can research and find out the ideal conditions for your particular strain, and from there move onto choosing your fruiting chamber.
Monotub vs. Shotgun Chamber
Monotub

Works best for top fruiting mushrooms that prefer hardwood or manure based substrates. A common method of use is to add grain spawn and fruiting substrate directly into a sterilized monotub for the incubation and fruiting phase. Calculating your spawn and fruiting substrate ratio can be a challenge although maintaining temperature and humidity is fairly easy. Substrate containing vermiculite or a casing layer are often used as a way to hold moisture and help maintain humidity. Holes are drilled around the chamber and covered with tape during incubation and some form of a filter during fruiting. Monotubs allow the use of plastic liners or grow trays for easy cleanup. Although reusable, everything must be cleaned very carefully after harvest to prevent contaminations in your next grow cycle.
Shotgun Fruiting Chamber

Best choice for mushrooms that grow in substrate bags or in blocks. Typically, growers place fully colonized substrate blocks, bags, or cakes directly in the chamber for fruiting. This chamber type requires a location without excessive air currents in order for the natural currents to work correctly. Shotgun chambers are quite easy to setup but the challenge is maintaining optimum airflow and humidity level. Generally, damp perlite is used on the bottom of the chamber to maintain high humidity levels. Holes are drilled around the chamber and left uncovered during the fruiting phase. As far as cleaning goes, shotgun chambers simply require a good wipe down and perlite should be cleaned at least once per month (or immediately after any outbreaks of contamination).
How to Build a Monotub Fruiting Chamber
Many mushroom growers have different opinions on the best way to construct a monotub and the truth is that there are a number of tried and proven designs that will lead to a successful harvest. A few materials you will certainly need are; a clear plastic bin or tote, a drill with 1/4” drill bit and 2” hole saw/bit, 3” duct tape (or similar tape), micropore tape (or polyfill), duct tape,and either a plastic liner, a grow tray, or black paint.
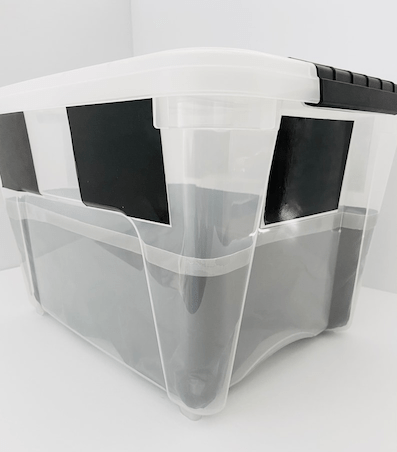
When you grow in a monotub, the idea is for the mushrooms to form and grow on the top surface of the substrate, and not the sides or bottom. When light and fresh air are introduced to your chamber, this will be the trigger that initiates the fruiting phase. This all being said, it’s important that the sides and bottom of your substrate are not receiving any natural light throughout the grow process. This is done by using either a black liner, a dark/solid colored grow tray, or painting the bottom and lower sides of our chamber with black paint.
My personal recommendation is always to drill your holes first and foremost. For a monotub we need to drill 2” holes around the top portion of the chamber (about 1/8 to 1/4 of the way down from the top, no lower) and holes should be roughly 6” to 8” apart. Most designs will have 2 or more holes on the long sides and at least 1 hole on the short sides. The next set of holes is optional, as growers have different opinions. The next set of holes should be 1/4” in size and go around the lower portion of the chamber (about 1/4 of the way up from the bottom, no higher). The reasoning for having the holes is to provide areas of passive air exchange and help retain water or humidity. This again is only my opinion but it makes sense to have the additional holes around the lower portion of the chamber because you can keep them covered entirely (which is the same as not drilling them at all), or you can use micropore tape (or polyfill) on selected holes to play around with and adjust your airflow. This simply gives you that much more control over the conditions within your chamber. Once holes are drilled, I always suggest using 80-120 grit sandpaper to smooth out the edges of the larger holes, and a sharp box cutter knife to clean the edges of the smaller/lower holes.
Before taping your holes, the next best thing to do is either paint the bottom of your chamber, or install your plastic liner. If you tape your holes first you run the risk of either damaging your tape-job while putting in your liner, or accidentally getting paint on your tape- if you’re going the black paint route.
If using the liner method: Always put your liner in right before you are going to use your monotub. You don’t want to install your liner and let your chamber sit for days or weeks, this is only an invitation for outside contaminants to sneak in undetected. Also be sure your chamber and both sides of your liner are wiped down and cleaned well with isopropyl alcohol (91% or higher) before putting in your spawn and fruiting substrate.

If you are using the grow tray method, which is the simplest and easiest method, all you need to do is drill and tape your holes, and give the chamber a good wipe down with alcohol.

If you are using black paint method: you can use regular indoor or exterior paint and a brush, or black spray paint. Spray paint can get messy quickly and can be particularly challenging if you don’t have an open space and nice weather. Whichever route you go, it’s best to use painters tape to mark your line around the chamber. Generally 3” to 5” inches from the bottom will do the job but all depends on the amount of spawn/substrate you are using and the size of your bin. You want your line to be just above where you expect the surface of your substrate will be. Paint everything below your painters tape including the very bottom of the chamber. Multiple coats may be required; the best way to check if you need additional coats or touch-ups is to hold your chamber up to the sun or any light source and check to see if any light is coming through the painted area. Once you’re satisfied with your paint job and it’s fully dry you can then remove the painters tape, tape your holes and get ready for use.

The purpose of taping the holes is to help both maintain moisture and keep out contaminants. Taping the holes is a fairly obvious and simple process but there are a few ways to do it. Your options are 1) cover your holes with duct tape during incubation and replace with micropore tape at the start of fruiting. 2) put micropore on the interior and duct tape on the exterior, removing the duct tape after the incubation phase. 3) use duct tape during incubation and instead of replacing with micropore tape, stuff holes with polyfill. Polyfill is a breathable fibrous material that can help retain moisture and maintain humidity, just as the micropore tape does. Micropore tape is a more preferable choice as it is more effective at keeping out contaminants.
No matter what method or technique you are using, it’s always important to maintain cleanliness so be sure to wipe down your hands, work space, the inside and outside of your chamber (lid included) and liner or grow tray with 91% (or higher) isopropyl alcohol right before you put you put in your spawn/substrate.
Hopefully you now know a little bit more about what a fruiting chamber is, and how to grow mushrooms in a DIY monotub!
Happy growing!
MUSHLOVE